
Welcome to the Fisher Body Craftsman’s Guild website help page. Refer to this page to get started with your new account!
Member Registration
If you are a Guildsman, and new to this website, click on the “New Registration” link on the home page (shown below)

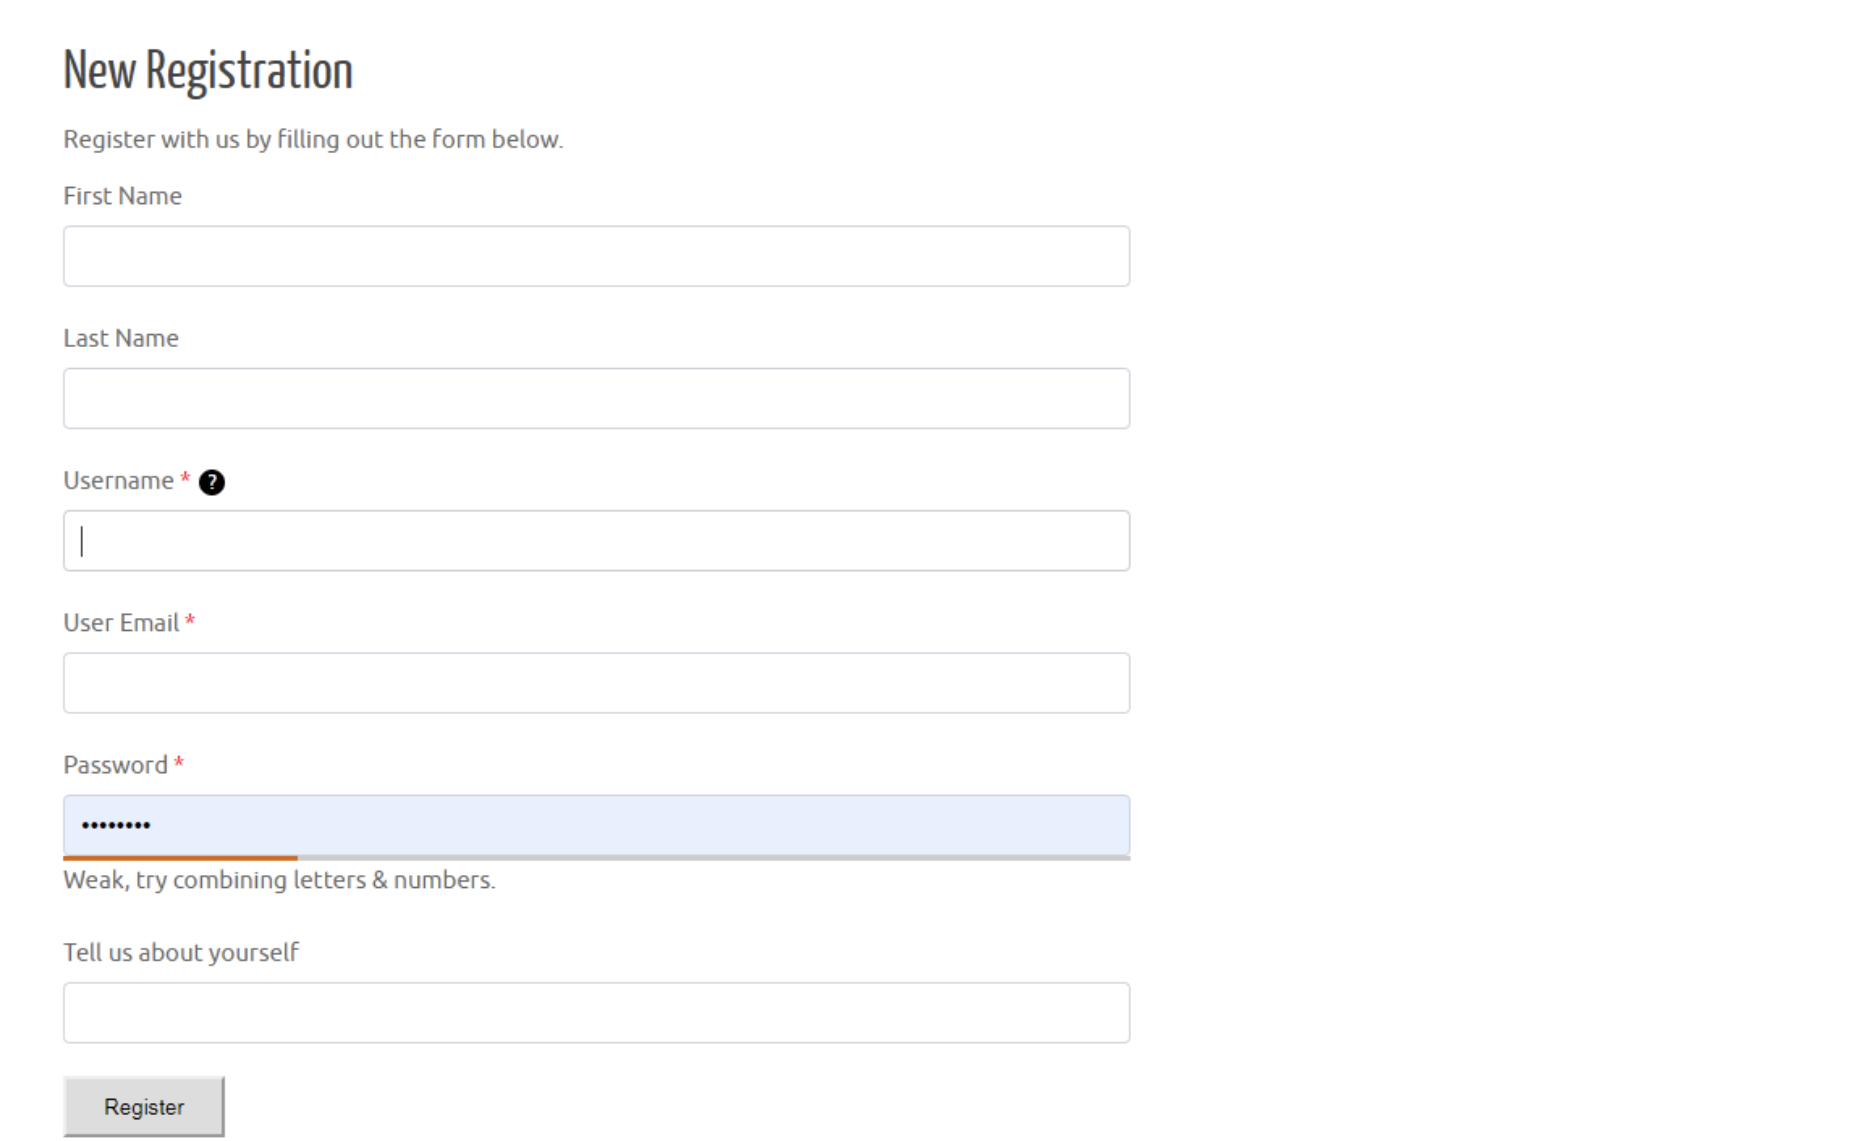
On the registration page, you will be presented with a form to fill out (example shown below). Please include some details about yourself and your history. Once submitted, a site administrator will be notified to verify and approve your new account.
Logging In
Once your information is approved by an administrator, you should receive an email letting you know that you can now go use your new account. When you return to the website, you should click on the “Log In” link in the navigation bar (shown below).

At the log in window (shown below), enter either the username or the email address you selected during registration in the first field, and the password you created in the second field. If you check the “Remember Me” box, your browser can store your credentials to make it easier next time yo visit the site.
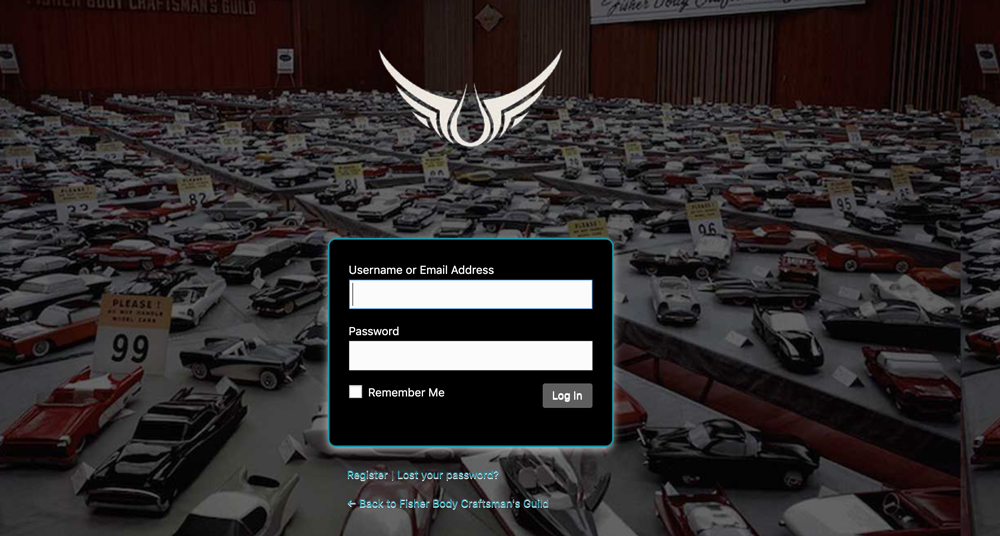
*NOTE: If you forgot your password, click on the “Lost your password?” link below the login screen to get an email that will help you reset it.
Member Profile Pages
Your member profile page is the heart of our website and your own personal showcase. The more you add to it, with images of your models and details about your Guild history, the richer the site is for everyone.
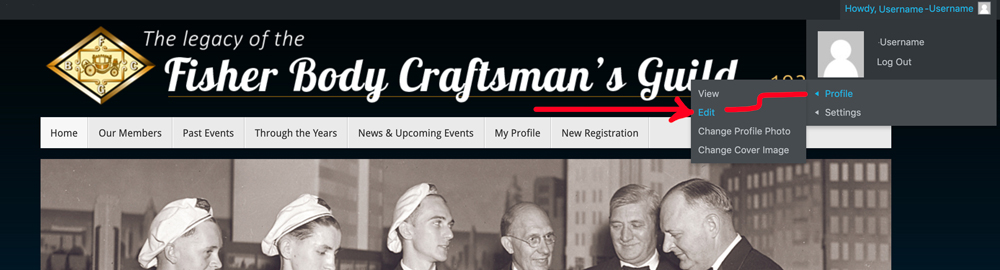
Now that you are logged in, you will see a new menu in the upper right hand corner of the screen. Click on your name to display the dropdown menu of options. Your first stop should be “Profile” – “Edit”.
Some of the information you can add to your member page:
- Guild information, competitions and awards
- Your profile picture
- Post images of your model
- Post a cover image.
The next several screens below will give you an overview of account settings and options you will have access to.
Two Different Sections
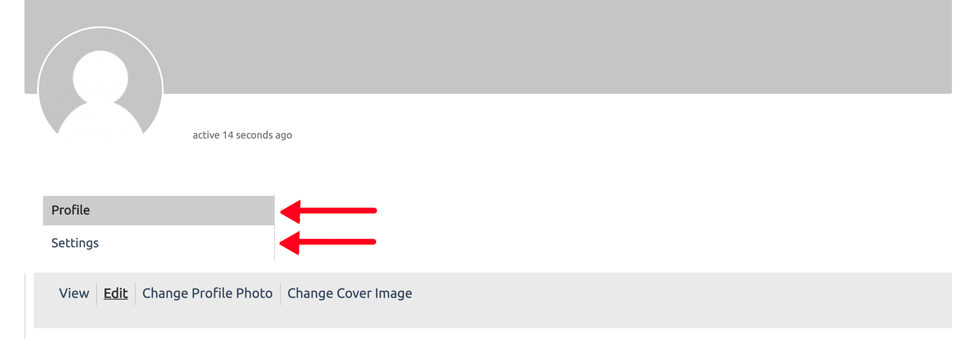
The two main sections of your account options:
Profile (where you add and manage your profile page content)
Settings (where you make any account level changes)
The horizontal list of menu options will change depending upon which one is selected. In this example, you know that “Profile” is selected because it is gray, and the “Edit” menu is active because it has a line under it.
Profile Section
This first screen shown here is likely what you will see when you first access the edit your profile area.
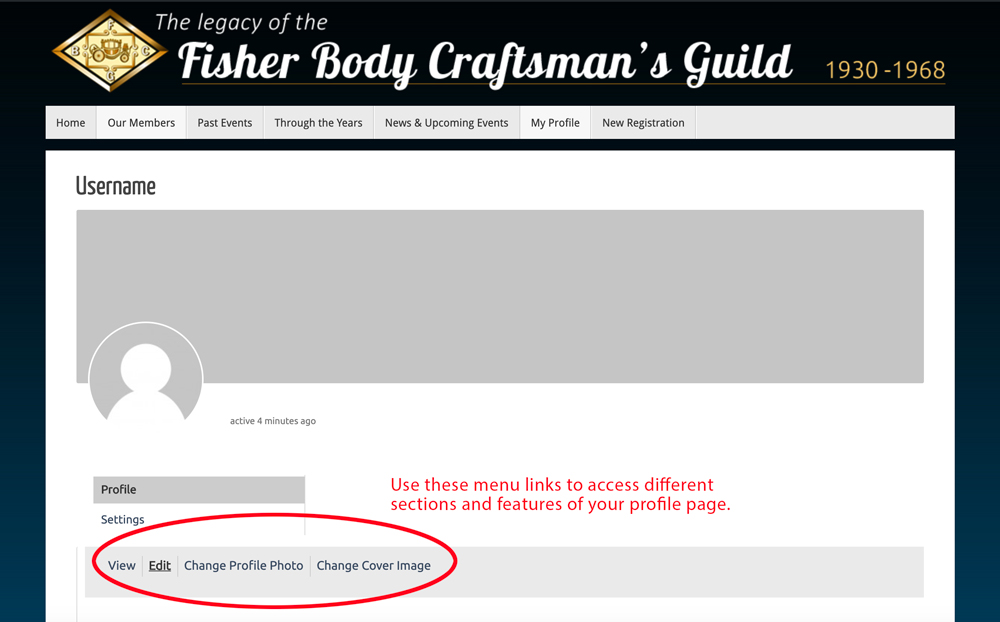
View (click this option to preview what your profile content will look like)
Edit (this is the section where you upload photos, dates, stories and information you want to share)
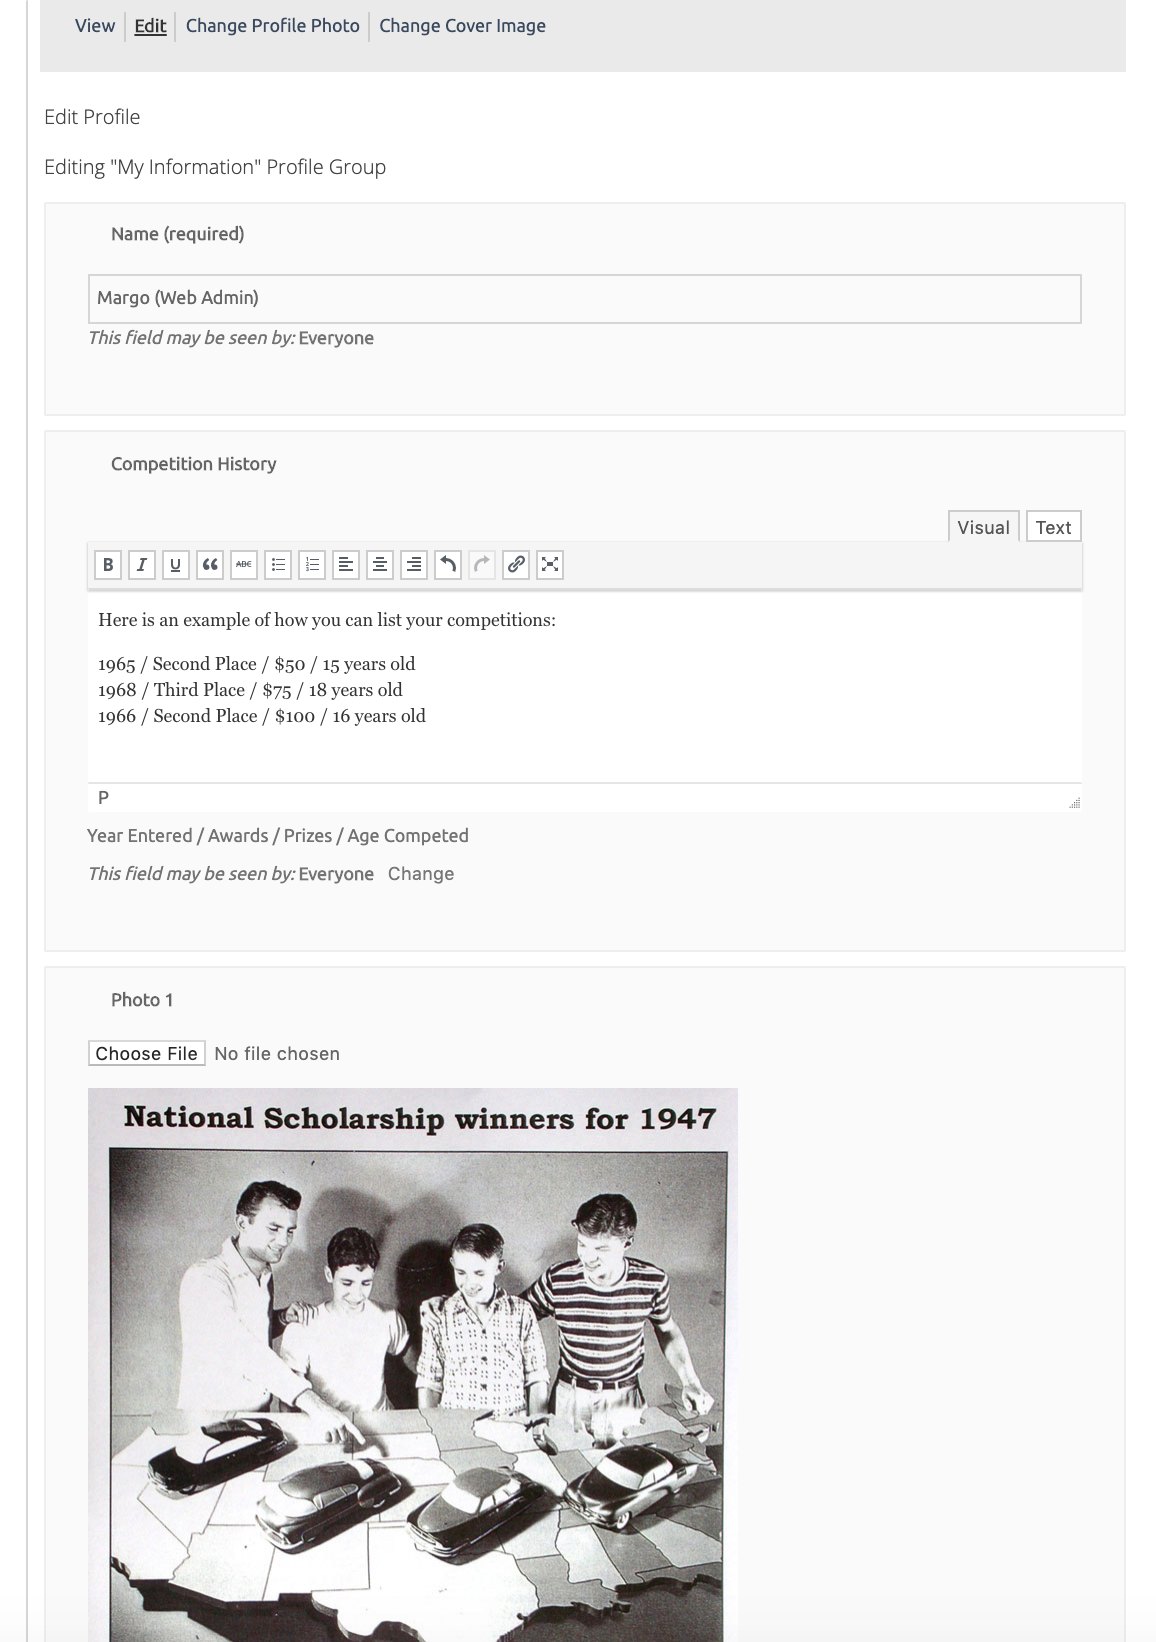
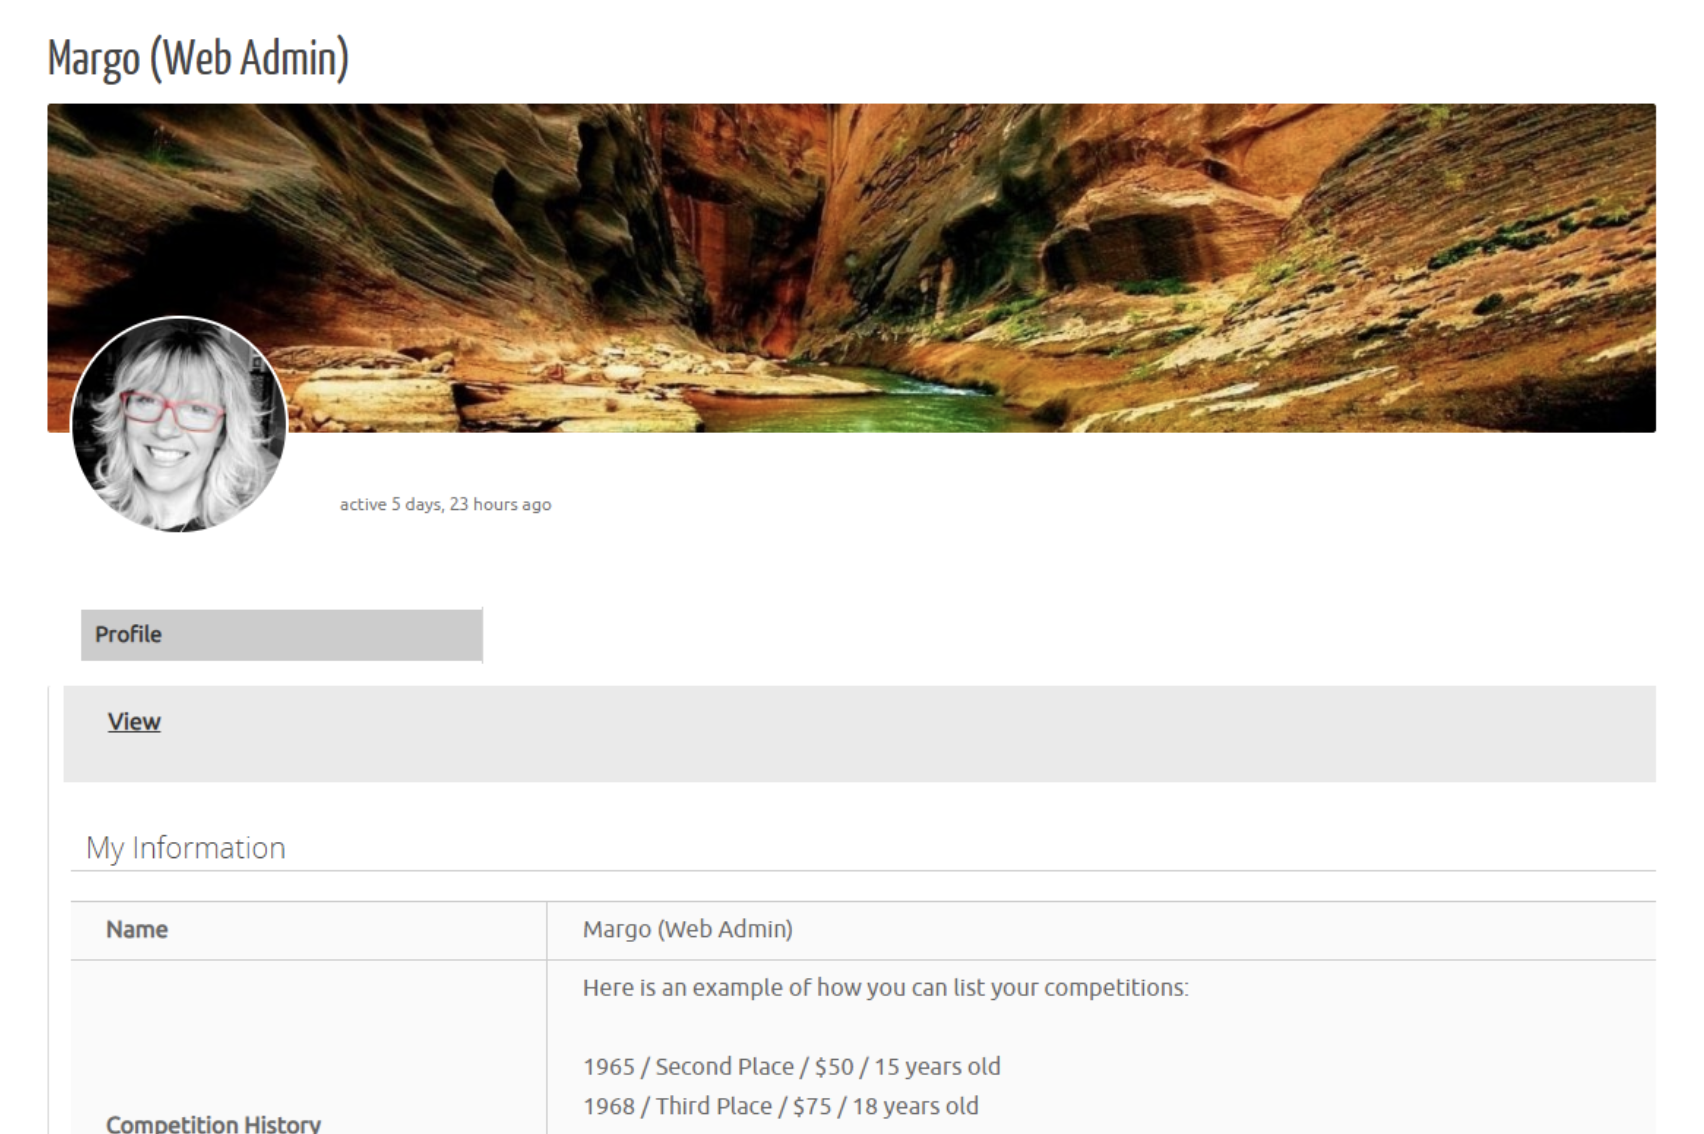
In this screenshot below we show an example of how you can add whatever information you want and images to go with it. Be creative and dig out those old photos!
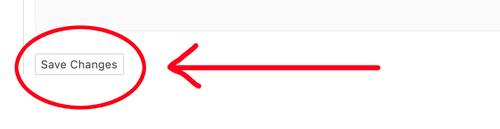
IMPORTANT!
Don’t forget to scroll all the way to the bottom of the page to save your changes before you leave the page.
Change Profile Photo (add a headshot for your profile page)
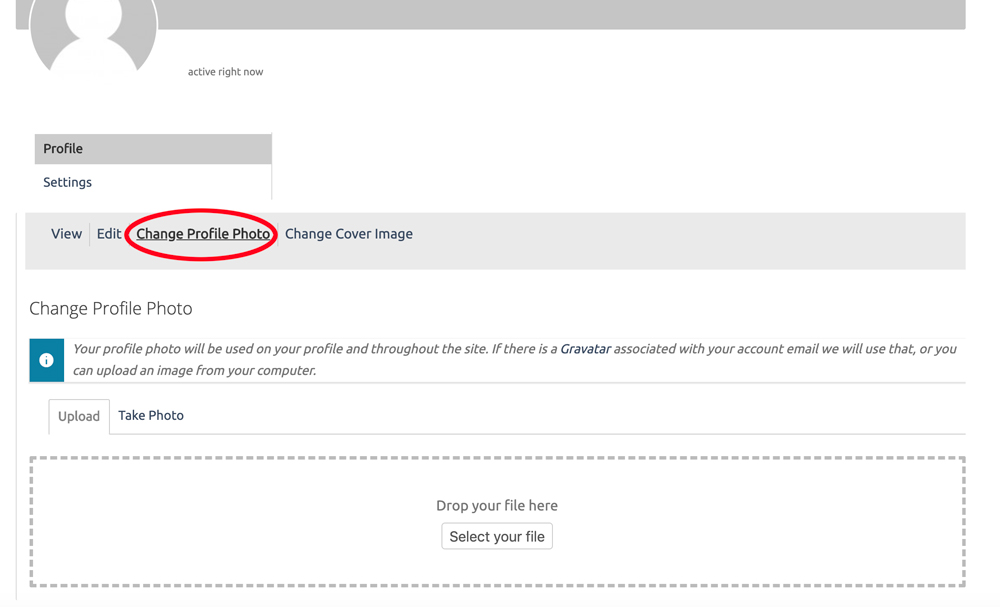
Change Cover Photo (add a cover photo to appear with your profile and change it up as often as you like)
Select the “Change Cover Image” menu item to upload a nice cover image (.jpg or .png) to be displayed on your profile. The screen tip is yellow will give you an ideal image size to use and you can drag and drop it into the box displayed.

Here is an example of what it would look like with a cover image:
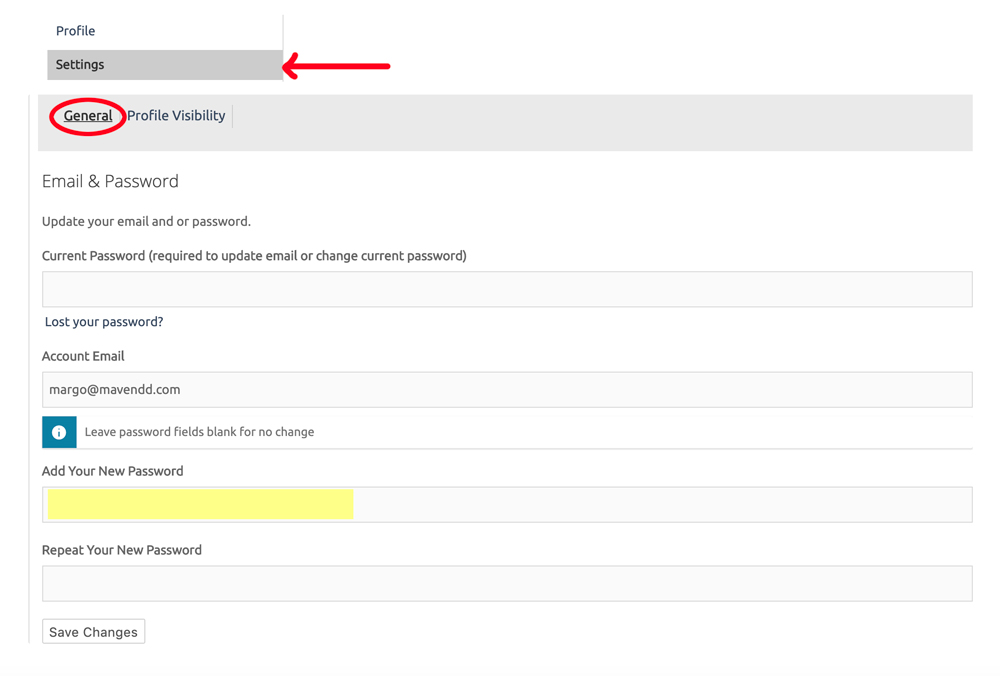
Settings Section
General
When the “General” option is selected, you will be presented with options to update the username, email or password for your account.
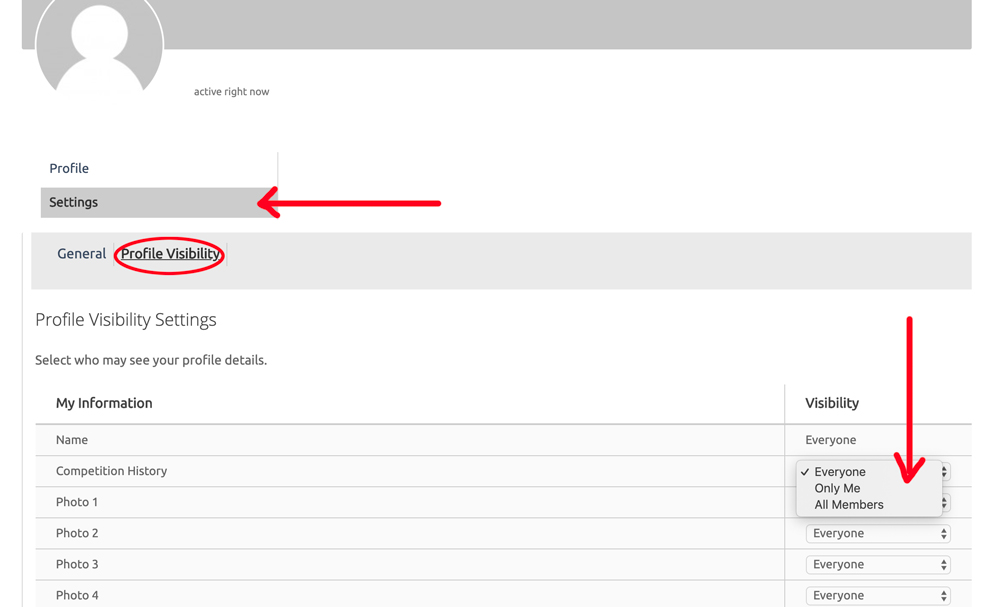
Profile Visibility
When the “Profile Visibility” option is selected, you will be presented with options to control the visibility of all the content you added in the edit section. By default everything will be set for all to see.
We hope these quick start instructions will get you on your way!